All New Post To Tumblr Chrome Extension created with Haxe & Robotlegs
I have been working off and on for a while on an update to my popular Chrome Extension 'Post To Tumblr' and seeing as Tumblr have just changed thier API I thought it was time to accelerate its development and release it, finally.
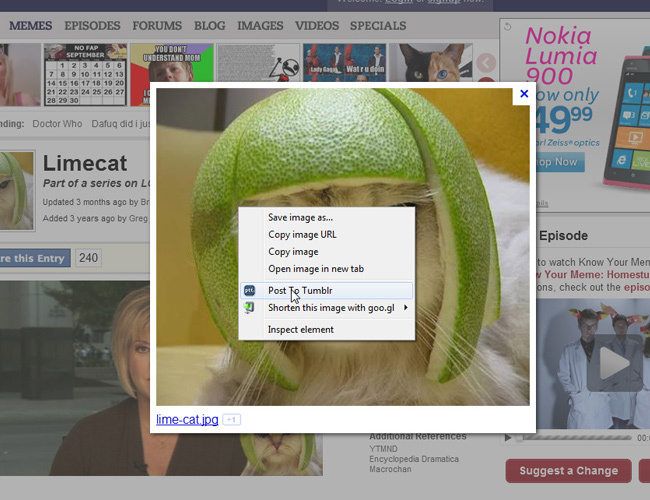
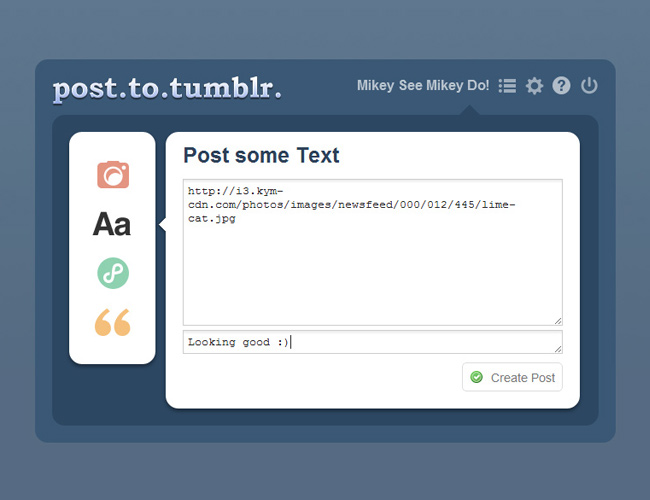
First some screenshots to give you an idea of what it does:
You can right-click any thing on a page and "Post To Tumblr".
A new tab opens where you can format it how you like.
You can change the post type very easily.
When done you just "Create Post"
This version is written totally from scratch using Haxe's Javascript target. Although not strictly necessary for something as simple as this I thought it was a good opportunity to experiment around with Haxe's JS capabilities. I must admit I was pleasantly surprised at how well it worked.
Most stuff just worked. There are also plenty of externs out there for the popular Javascript libraries on lib.haxe.org such as the "chrome-extension" library.
Having type-safe Javacript is great for for so many reasons that im not going to get into here. I must admit however there were times when I was lazy and didn't want fancy creating a type-safe extern class for a library. Fortunately however Haxe has a mechanism for the lazy coder in the form of "untyped".
An example of this is the way in which you access the "localStorage" object in chrome extensions. localStorage is basically a global object that you can set keys and values in and will persist for the life of your extension. To access it you use: "localStorage[myKey]" to return a value. If you tried to do that in Haxe it would throw an error because Haxe has no concept of global variables (quite rightly).
So to access the localStorage you can use untyped to quickly get access to a global variable, I then decided to wrap this little hack in a Model class to make it a little neater:
package models;
import js.Lib;

/**
 * ...
 * @author MikeC
 */

class ChromeLocalStorageModel extends BaseModel
{
	public function get(key:String) : Dynamic
	{
		var val = untyped localStorage[key];
		trace('Getting from localStorage: '+key+" :: "+val);
		return val;
	}

	public function set(key:String, val:Dynamic) : Void
	{
		trace('Saving in localStorage: '+key+" :: "+val);
		untyped localStorage[key] = val;
	}
}
This lets you just just mix and match the type-safe stuff when you need to and just do a little "hack" when you need to ;)
The above example also shows off another cool feature im using in Post To Tumblr, which is RobotLegs. Thanks to the fact that the RobotHaxe library is written in pure Haxe (has no platform specific bits) that means I am able to use it on a Javascript project.
The only problem is the issue with Views and Mediation. Because unlike Flash events don't bubble up to a central source there is no way to do automatic mediation in the JS target. Instead what you do is implement "IViewContainer" on your context view, then whenever a child is added or removed you call viewAdded() or viewRemoved() that way the MediatorMap can try to make a mediator for that view.
Im not sure if the way I have used RobotLegs is the correct or best way, it was more of an experiment as I went along. The way I have done it is to wrap many of the main HTML elements in my own view classes. So for example I have a "DivView" that represents a "div" and extends BaseView:
class DivView extends BaseView
{
	public function new(elementId:String=null)
	{
		super(Lib.document.createElement('div'));
		if (elementId != null) element.id = elementId;
	}
}
BaseView implements the IViewContainer interface:
class BaseView implements IViewContainer
{
	public var viewAdded:Dynamic -> Void;
	public var viewRemoved:Dynamic -> Void;

	public var element : HtmlDom;
	public var parent : BaseView;
	public var children : Array;

....

	public function new(element:HtmlDom)
	{
		this.element = element;
		this.children = [];
		isLayoutInvalid = true;
	}

	...

	public function add(child:BaseView) : BaseView
	{
		children.push(child);
		child.parent = this;
		child.viewAdded = viewAdded;
		child.viewRemoved = viewRemoved;
		if(viewAdded!=null) child.addChildren();
		element.appendChild(child.element);
		if (viewAdded != null) viewAdded(child);
		return child;
	}

	public function remove(child:BaseView) : Void
	{
		if (viewRemoved != null) child.removeChildren();
		children.remove(child);
		child.parent = null;
		child.viewAdded = null;
		child.viewRemoved = null;
		element.removeChild(child.element);
		if (viewRemoved != null) viewRemoved(child);
	}

	...

}
Then say I want to construct the following html:
<div id="container">
<div id="inner">Hello World!</div>
</div>
I would do something like this:
class MainPopupContainer extends DivView
{
	private var inner : DivView;

	public function new()
	{
		super("container");

		inner = new DivView("inner");
		inner.element.innerHTML = "Hello World!";
		add(inner);
	}
}
Then perhaps I want to turn the "Hello World!" red when clicked I would do something like this:
class MainPopupContainer extends DivView
{
	private var inner : DivView;

	public function new()
	{
		super("container");

		inner = new DivView("inner");
		inner.element.innerHTML = "Hello World!";
		add(inner);

		new JQuery(inner.element).click(onInnerClicked);
	}

	private function onInnerClicked()
	{
		inner.element.style.color = "#FF0000";
	}
}
What this means is you have a RobotLegs-familiar looking View with a Mediator behind it (thanks to the mediation happening when you call add()) which is nice. What it does mean however is I have quite abit of boiler plate wrapping the HTML nodes, which definitely slowed down my development.
Another thing im not sure about is my mixing of in-line styles and stylesheets. Sometimes I would use the styles in my css and other times I would just set them on the element directly. To be honest, because I was using classes and inheritance and all that good stuff I usually found it easier and more expedient to set the styles inline in my View class rather than go digging through several hundred lines of css to find the selector I was looking for
For example I may have a "HeaderOptionButton" that defines some inline styles then whenever I wanted a button that looked and acted like a header button I would just make and add a HeaderOptionButton. I know im probably going to get flamed to hell and back for that!
As I said, im not sure if im doing it the "right" or "best" way, its just the way that seemed to work at the time ;)
Well that's a quick overview of where im at. Once I have cleaned the project up a little and added some missing features ill be sticking the source up on GitHub for anyone interested.


